


Being an Android operating system is a tough job. But our little green guy knows his job well and adjusts himself to suit our needs. We can groom him and change the way he works too. You just need to know what you want and how to get it.
Right from the theme, the UI, the kernel, the recovery, anything and everything of your Android smartphone can be tweaked to suit your needs. The OS is truly like the desert it is named after. This work is fairly easy, but sometimes flashing a Custom ROM can be a headache, it might lead to unexpected and unwanted errors and our little green guy may become sick or go into a coma.
When flashing custom ROMs, users may encounter issues like bootloop (fixed by wiping cache/dalvik), ‘Status 7 error’ (resolved by updating recovery or editing the updater-script), devices booting to bootloader mode (solved by relocking and unlocking bootloader), and handsets booting straight to recovery mode (addressed by flashing the correct ROM or firmware).
For those of you who are having problems with this process, here’s our little list of errors you could face while flashing ROMs and a tutorial on how to fix these common errors.
From Earlier: 7 Reasons You Should Switch to an MIUI ROM
#1 – Your handset is stuck in a Bootloop

Well, this is the most common issue when talking about Android devices. Also, the problem can be easily fixed as you only have to wipe the system of your device. Usually, the boot loop problem occurs when you forget to wipe the data from the phone after flashing a ROM as there are residuals in the ROM from the developers which don’t allow the phone to boot up completely.
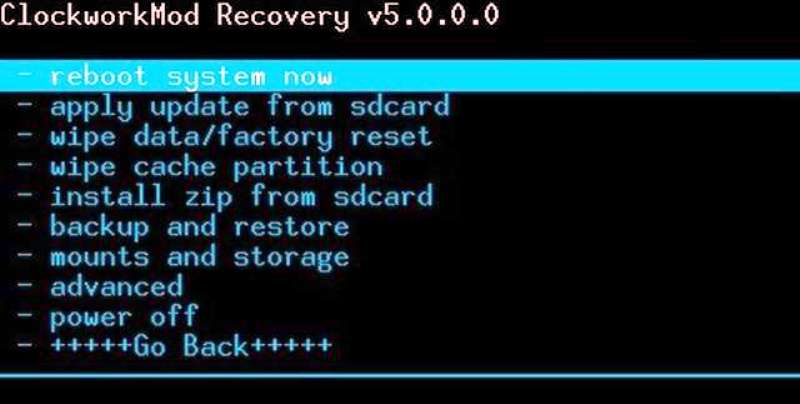
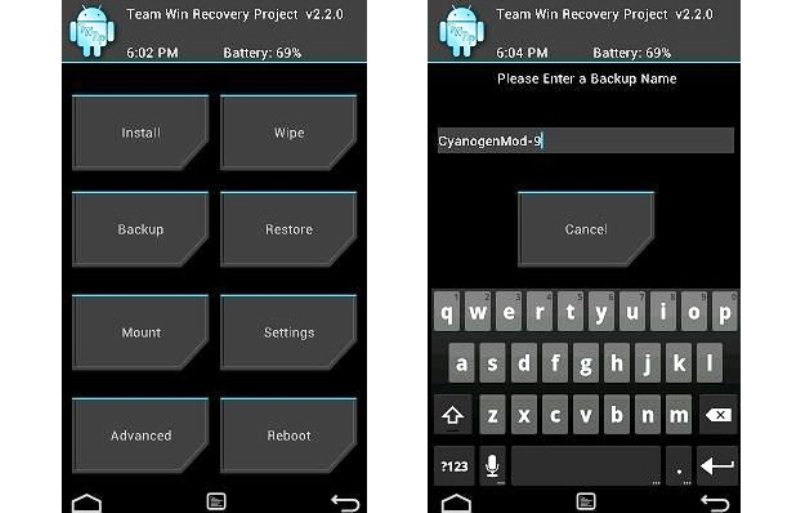
Now, in this method we assumed that you have installed a custom recovery image on your handset: like CWM recovery, AmonRA, TWRP recovery and so on. Use the recovery for wiping the system of your handset thus resolving the boot loop issue. Be aware though as each device can be entered into the recovery mode differently; usually you need to press a combination of buttons (for example on Samsung you need to press Volume Up and Home buttons) while Powering up your tablet/smartphone. Once the recovery mode entered you need to follow the following instructions:
- Use the Volume keys in order to navigate through the recovery menu.
- Select “Advanced” and choose “Wipe Dalvik Cache”.
- Return to main menu.
- Then select “Wipe Data Factory Reset”.
- Return and this time choose “Wipe Cache Partition”.
- Return and select “Reboot System Now”.
- Your handset should start in the Android OS now.
So, there you have it; now the boot loop problem should be resolved and you should be able to safely use your custom ROM firmware.
#2 – Your handset doesn’t allow the flashing of a ROM showing ‘Status 7 error’
When installing certain custom ROMs on rooted Android smartphones or tablets, you will encounter ‘Status 7’ error issues once in a while with ClockWorkMod (CWM) Recovery.
Status 7 error is caused when the ROM’s updater script file checks to see if the phone model of your phone is compatible with the ROM you are installing, called ‘asserts’
‘Asserts’ is a safety mechanism which prevents you from accidentally installing another phone model ROM on your phone.
Now, this safety mechanism is great but there are times where even if you have the correct ROM for your phone, you will get the Status 7 error. This is due to an error by the developer of the ROM in the updater script, causing havoc, making people install another custom recovery like TWRP recovery for no reason. You can fix the issue by installing TWRP recovery but if you need to restore your CWM backups later down the line, you will have to re-install CWM recovery, causing a big hassle.
Also, if you update to the latest CWM Recovery using ROM Manager, usually this problem is fixed.
But what if you did update to the latest CWM Recovery and still happens? And yes, it does happen even when you update your CWM recovery.
If you simply don’t want to change your recovery (because if it isn’t broken, don’t fix it) or you still get Status 7 error after changing the recovery, you can simply edit the updater script yourself to get rid of the asserts.
All you need is a computer and a compressing program! You might even be able to do it on your Android device with AndroZip and a text editor.
- Copy the ROM zip file to your computer and extract it using your decompressing software.
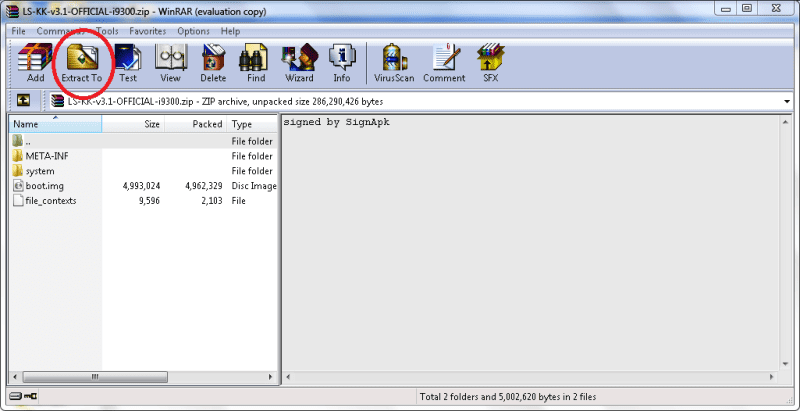
- Once unzipped, browse to the ‘META-INF/com/google/android’ directory. Here, you will find two files called ‘update-binary’ and ‘updater-script’
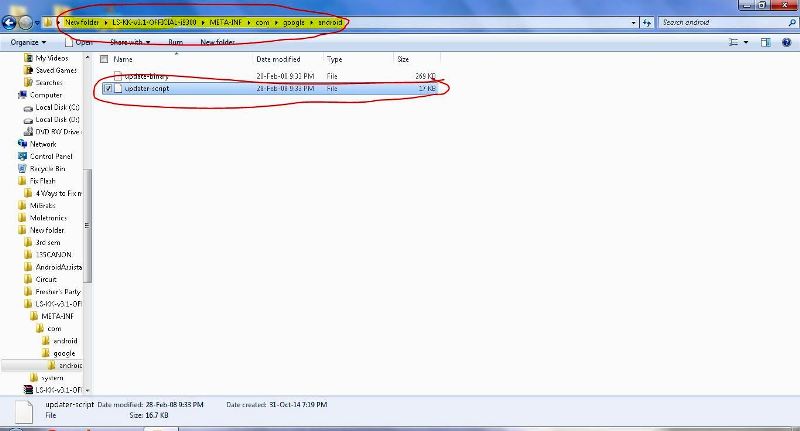
- Rename ‘updater-script’ to ‘updater-script.txt’ and open with your text file editor (You need to enable file extensions in the control panel to be able to do this)
- Get rid of the line starting with ‘assert’ to the next semi-colon. Usually this is the first line or one of the first lines at the top of the text file. Just delete them. Remove everything until the command ‘mount’ is visible.

- Save the file.
- Rename ‘updater-script.txt’ back to ‘updater-script’
- Re-compress all the files.
- Use this .zip file to flash the ROM.
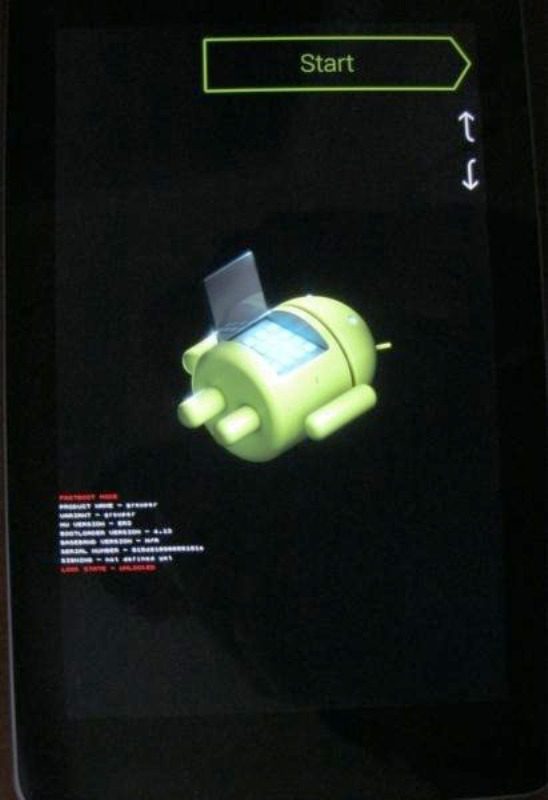
#3 – Your device is booting straight to bootloader mode
In this case, the only way in which you can resolve the problem is the stock Android OS. Yes, unfortunately you will have to flash the official Android firmware on your device. In this way you will be able to restore the stock restrictions and default settings and your smartphone/tablet will be restored to its initial state.
Of course, if your handset is rooted, after flashing the stock ROM, the root access will be revoked and the bootloader relocked. The best though is that you will be able to restore the lost warranty and the default Android system with stock features, apps and capabilities.
Now let’s see how you can update or downgrade different devices to stock/official Android firmware:
For Samsung:
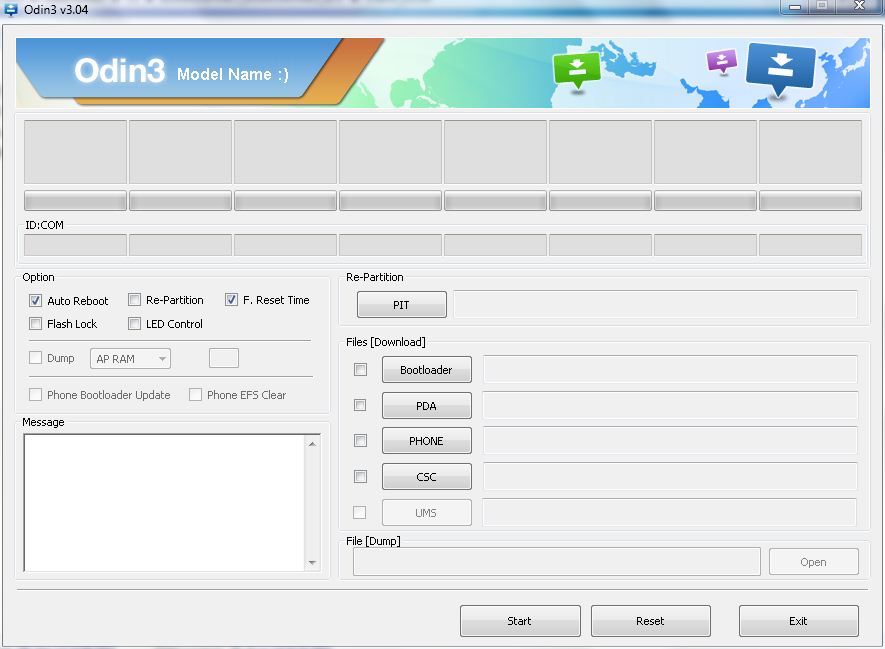
- You need to use a Windows running computer, where you will have to download Odin (Google it, it’s quite easy to find) and the update file.
- Unzip both files and also install and run Odin.
- On the PC, the smartphone’s drivers must be installed; you can use Samsung Kies for completing the same.
- Then, reboot your handset in download mode (usually by pressing on Volume Down, Power and Home buttons simultaneously) and connect your device to the computer.
- In Odin, now select ‘PDA’ and pick the update file.
- Press ‘Start’ and wait while the software is being flashed.
For HTC:
The HTC stock ROMs are dubbed as RUU and the same can be flashed straight from bootloader mode.
- So, get the RUU specific file for your device and place the same on the SD card.
- Rename the file into something like PG05IMG.zip.
- Then as soon as you reboot your device, the firmware should be flashed automatically, from HBOOT, HTC’s bootloader.
For Motorola:
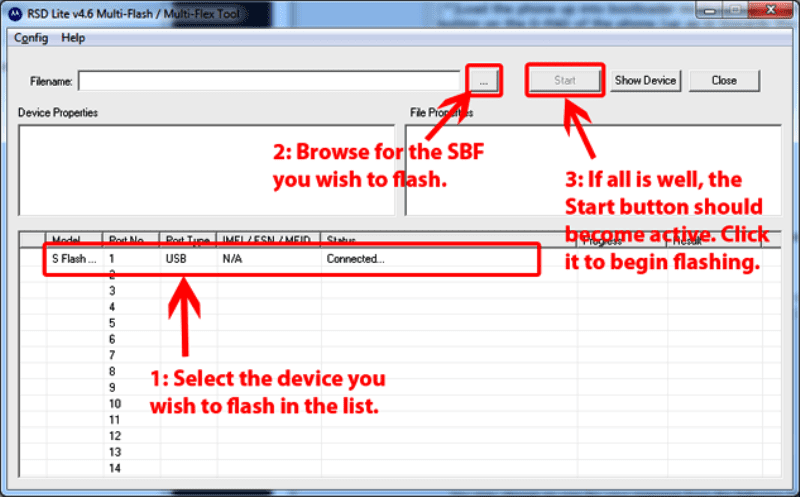
- On your computer, you will have to use RSD lite, which is a program similar to Odin, but in this case, it is specifically programmed to flash Motorola devices. So, download and install RSD Lite.
- Also install the phone’s drivers on your computer.
- Download the update file on your computer.
- Turn off your device and connect it with the computer.
- Reboot your handset into bootloader mode.
- Launch the RSD Lite program.
- Pick the .sbf file from the computer and start the flashing process.
- In the end the device will reboot into Android; don’t unplug the USB cable until you are sure that the Android system is booted; if not re-do the update operation until it works.
For Sony:
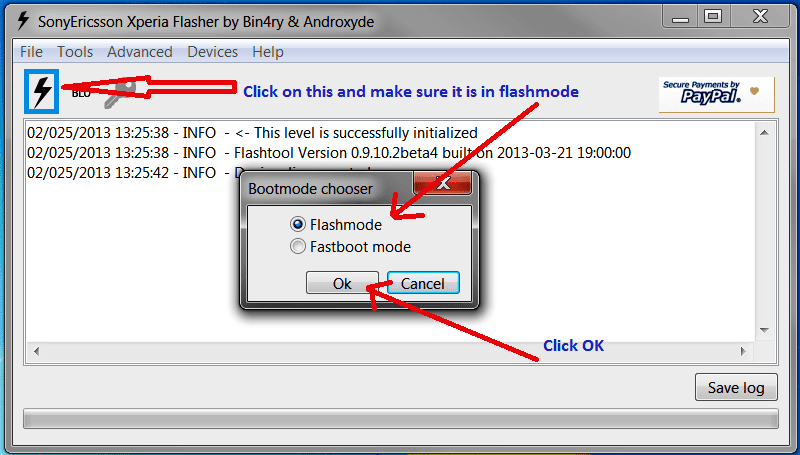
- Download and install Flashtool software on your Windows PC.
- Download the required official update file onto your computer.
- Power off your device.
- Launch Flashtool and click on the lightning icon, while choosing the required update file from the browsing window.
- Turn off your device and press the volume down button while connecting your device to your computer using a USB cable.
- The update will automatically start so wait for the software to be flashed.
#4 – Your handset boots straight to recovery mode
In case, after flashing a custom ROM, your handset enters right to the recovery mode, then you can try to wipe the system and see the results. But, most likely the wiping solution will not work here. You see, if your device is stock in recovery mode, then it means that you have flashed an inadequate ROM, or there is something wrong with the ROM you choose.
Therefore, you will have to re-install the firmware on your phone. You could follow the same steps as with the previous issue or you could just flash another ROM from you SD card.
These were few of the most common problems faced by newbie developers while flashing ROMs. We hope this was helpful. If you have any other problems or suggestions, feel free to comment your queries, we will be happy to help.